What Is Firebase?
Firebase is Google’s Backend-as-a-Service (Baas) solution for mobile app development. Originally it was developed and launched in 2011 by Firebase Inc, and later was acquired by Google in 2014. It started off as a realtime database; however, now it offers developers and marketers a comprehensive selection of tools and products to not only help develop advanced applications but also to market them. The Firebase platform allows for easy integration with IOS, Android, Web, and Unity products. There is a lot to learn about the platform; however, in this article we will cover Firebase Cloud Messaging (FCM).
What Is Firebase Cloud Messaging?
Firebase Cloud Messaging (FCM) is a free tool that allows you to push notifications and messages to your clients’ devices. This tool is perfect for both developers and marketers as it is easy to set up and even easier to use. Some of the key capabilities of FCM according to Google include “sending notification or data messages, versatile message targeting, and receiving messages from client apps”. More information on these capabilities can be found in the Firebase documents. In this article, I will show you how to create your first Cloud Message and how to track the analytics associated with it.
Setup
Before starting, make sure to add Firebase to your Apple, Android or Flutter project.
It is my opinion that the best documentation for adding the SDK to your project comes from Google itself; these are the links to get the SDK setup for Apple, Android, and Flutter.
Creating A Firebase Cloud Message
After setting up your Firebase project and installing the correct SDKs, open up the project and using the left-hand navigation find the link for Cloud Messaging. This will open up the Cloud Messaging dashboard where you can create new messages and also check on the analytics of your previous messages. To create a Cloud Message, click on the blue “New notification” button.

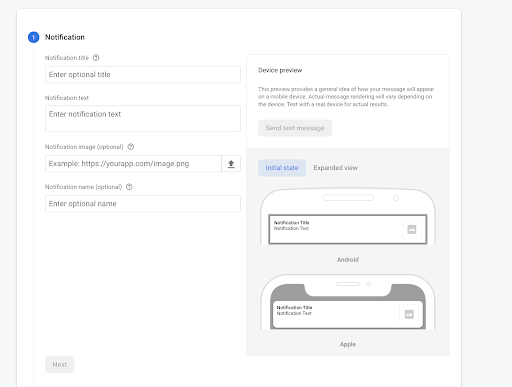
The first section of the creation process involves the content of your Cloud Message. The only field that is mandatory is the notification text. The title, image, and name are all optional. However, I would highly recommend uniquely naming each of your Cloud Messages as this is the best way to differentiate between your various campaigns. On the right-hand side you will be able to look at a preview of your message, and to take it one step further you are able to send a test message to your developer device using the FCM registration token.
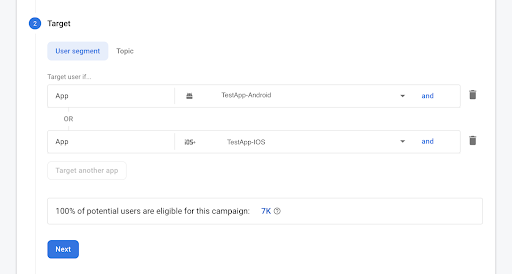
The following section allows you to choose your target audience. There are a few options including device category, country/region, first open, and more. The great part of this section is that it will let you know the percentage of users your campaign will reach based on your target audience decisions. For more advanced configurations you can also set up a Topic Message. More information on Topic Messages for Android and Apple can be found in the documentation.
The final mandatory section is the scheduling portion of the message creation process. By default it will send the message as soon as you publish it or you can choose to send it at a later date. You can also choose to make it a recurring message in this section.

The next two sections are both optional. With each campaign you will automatically track the amount of messages that were sent and opened. To take it a step further, you can include an additional conversion event to also be tracked with your campaign.

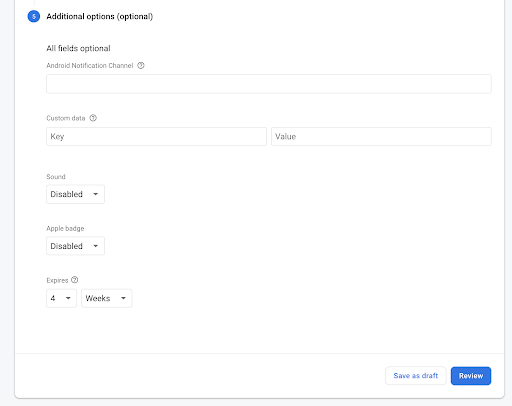
The additional options section allows you to assign a key/value pair to your message, add a sound effect, as well as add an expiration date to the message to let your system know when to stop trying to send the message. Once you have your message configured to your liking, click the blue “Review” button.
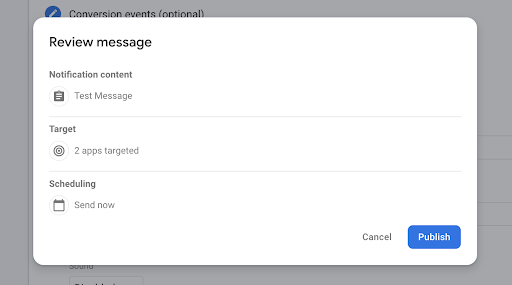
Before publishing your message make sure to carefully review the content, target audience, and scheduling date. Once you click “Publish,” then your first Cloud Message has been successfully created and sent. Congratulations!
Analytics
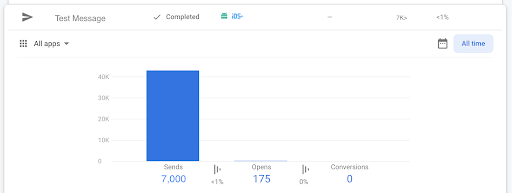
In the Cloud Message dashboard you will be able to see all of your campaigns and when you click on them it will show you the sends and opens attributed to each of your campaigns. It usually will take 24 hours before you start seeing data come through, so if you do not see anything right away don’t panic.
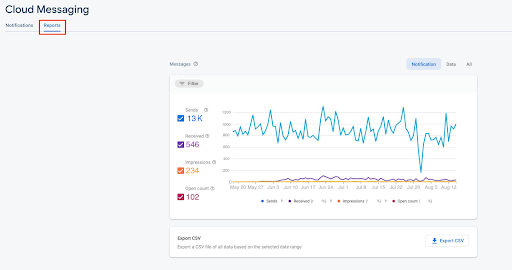
Additionally if you switch to the reporting tab, you will be able to see a graphical representation of all your campaigns. This feature provides an overview of your messages that have been sent, received, opened, and left an impression for a given time period. This data can be filtered by device and date, as well as be exported to a CSV. Note: the numbers in the picture have been fabricated for example purposes.
Conclusion
Firebase has an abundance of tools and features that are useful for both developers and marketers. Keep an eye out for my next article on Firebase Analytics. Also, if you haven’t already, make sure to check out my previous articles on Firebase by Google. If you’d like to discuss the current and future setup for your mobile application tracking and analytics, reach out to the team at InfoTrust.

