Goals are one of the most powerful tools in Google Analytics. They give you the ability to track your business objectives on your website or mobile application. But what is the easiest way to set up efffective and meaningul goals? Google Tag Manager makes the process easy, and you won’t need a developer to make it happen!

Goals in Google Analytics
4 Types of Goals
Destination
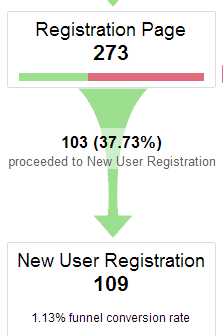
Destination goals are based on reaching a certain page on a website or a certain screen on a mobile app. When the user reaches that destination, the goal is triggered in Google Analytics. Destination goals are the only goal type that allow you to set up a funnel. This is done by entering the URL of each step in the funnel. If you select Required for the first step in the funnel, then only users who enter the funnel at that page and then proceed to the goal destination will be counted as a goal conversion in the Google Analytics Goal Funnel report.
Duration
Duration goals are simply goals based on how long a user is on your site. It is important to understand how session duration is calculated, however. Google Analytics tracks time between pages when there are multiple page views, and then adds on any time between the final page view and any engagement interactions (events, etc.). This is not a precise measure, but the only way Google Analytics can calculate it. For more on this, see Justin Cutron’s blog post explaining how time is calculated in Google Analytics.
Pages/Screens per Session
This goal type is triggered when a user views the designated number of pages on a website or screens in a mobile app.
Event
Event goals are triggered when an event occurs in Google Analytics that you have specified. Events typically have categories, actions, and labels (labels are optional) associated with them. They will also sometimes have a value. This will depend on how your events are implemented.
Using Google Tag Manager to Make Goals Easy
Virtual Pageviews
Virtual pageviews allow you to use destination goals when the actual URL of the page doesn’t change. This can be handy in a variety of situations: shopping carts, registration processes, and any other process that has multiple steps where the URL doesn’t change. Basically, you need to tell Google Analytics a new page is being viewed when it isn’t. In the old days, you used to have to hard code a page view in the source to do this. But with Google Tag Manager, it is now easy to set up virtual pageviews. Once you have figured out where you want your virtual pageview to fire, it’s a snap to set up in Google Tag Manager.
Step 1:
Create a new tag in your container:
Click the red New button and select Tag.
Step 2:
Pick your flavor of Google Analytics
*Note* If you are getting ready to select Classic Google Analytics click here and let’s talk about migrating you to Universal to get the most out of your data
Step 3:
Link this to your Google Analytics Tracking Number and select Page View as Track Type.
Step 4:
Assign a virtual URL to your virtual pageview
Step 5:
Assign a firing rule
How you set up your firing rule will depend on how your site is implemented. There are several choices here. You could listen for a button to be clicked. You could listen for an event you have coded into the site to fire. You could listen for a form to be submitted. Just use the basic principles of Auto-Event Tracking for this step (much more on this below).
Step 6:
Test and Publish
Once you have your virtual pageview working correctly, you can publish the container within Google Tag Manager.
Step 7:
Align the Goal in Google Analytics with your Virtual Pageview
Now the work comes to fruition. Simply enter the virtual URL from your tag into the Goal URL (or funnel step URL) in Google Analytics.
Auto-Events
Use Auto-Events in Google Tag Manager to trigger event goals. For most auto-events you will need to have the basic event listener tags set up. To see how to do this, check out Justin Cutroni’s blog on auto-event tracking. Once this is set up, use the following steps to send events to Google Analytics to trigger goals.
Step 1:
Create a new Google Analytics event tag
Populate the Category, Action, and Label parameters with appropriate information for the event you are firing.
Step 2:
Create a firing rule
Refer to the description above on how to set up a firing rule.
Step 3:
Test and Publish your container.
Take it live if it works!!! More on testing Google Tag Manager here.
Step 4:
Align your Google Analytics Goal with the Event Parameters
Populate the Category, Action, and Label with whatever you entered into your Google Tag Manager tag.
Go Goal Crazy!!!
Goals are one of the most valuable tools in Google Analytics. They allow you to track conversions and ROI. It is vital for all Google Analytics users to set up meaningful and accurate goals. If you want to learn more about goals or if you have any questions about your particular Google Analytics or Google Tag Manager setup, please contact us. We would be happy to help!


