Editor’s note:
On Oct. 14, 2020, Google announced that App + Web would be renamed Google Analytics 4, or GA4, and become the new standard tracking model across the Google Analytics platform. This announcement heralds in what is being deemed by many as “the future of analytics.”
In the previous post of this App + Web series, we covered the basics of App + Web, the new Google Analytics properties that will allow you to combine App + Web data in the same property. We discussed how this new property type utilizes an event-based data measurement model that comes with intuitive and useful features that will get you up and running with your web and app analytics in no time.
Whether you decided to start tracking your events with GTAG or GTM, the following tips and tricks will enable you to get better insights and ensure you have a best-practice implementation for your app or web data.
I love traveling, so I will use this travel site as an example to walk you through the tips and tricks. Please fasten your seatbelt, and we’ll soon get you to cruising altitude in your App + Web analytics!

Tip 1: Make Use of Google’s Recommended Events
While many events are automatically tracked with the App + Web measurement model, every website has unique elements and actions that need custom tracking. For these additional actions, Google provides a recommended list of events along with prescribed parameters. Using the recommended events ensures maximum available detail in reports and lets you benefit from the latest analytics features and integrations as they become available.
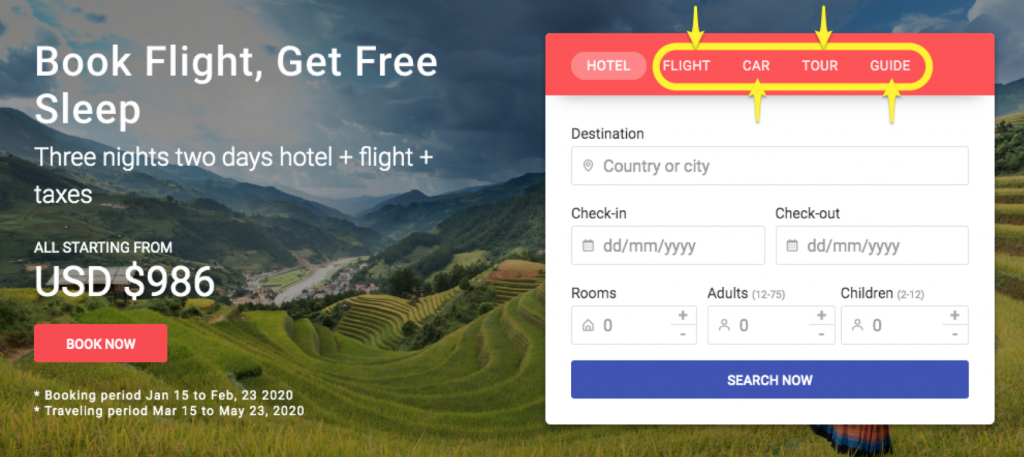
When a website visitor clicks on any of the links in the booking panel to switch between hotel and flight or car tabs, we want to track the clicks to measure engagement of the booking panel.
Google has recommended the event select_content that it uses for many different content tracking actions. Google prescribes two parameters for this event:
- content type
- item id
We also want to track some additional details about the text used in the tab (for example, if you renamed “tour” to “package”), as well as the order of tabs (just in case you switch the order of items in the panel). So, we can also add our own parameters to the event when we trigger it:
- item text
- item order
As a result, here’s the outlined tracking for the tab selection event using Google’s recommended event:
Tip 2: Set Up Custom Parameter Reporting for Automated Events
The Enhanced Measurement feature in App + Web provides lots of engagement tracking out of the box (scrolls, outbound clicks, video engagements, downloads and more). Those events, along with the automatically tracked events, will show up in the “All events” report, but without any configured parameters so you can’t slice-and-dice the data without configuring the parameters.
Use Case: File Downloads
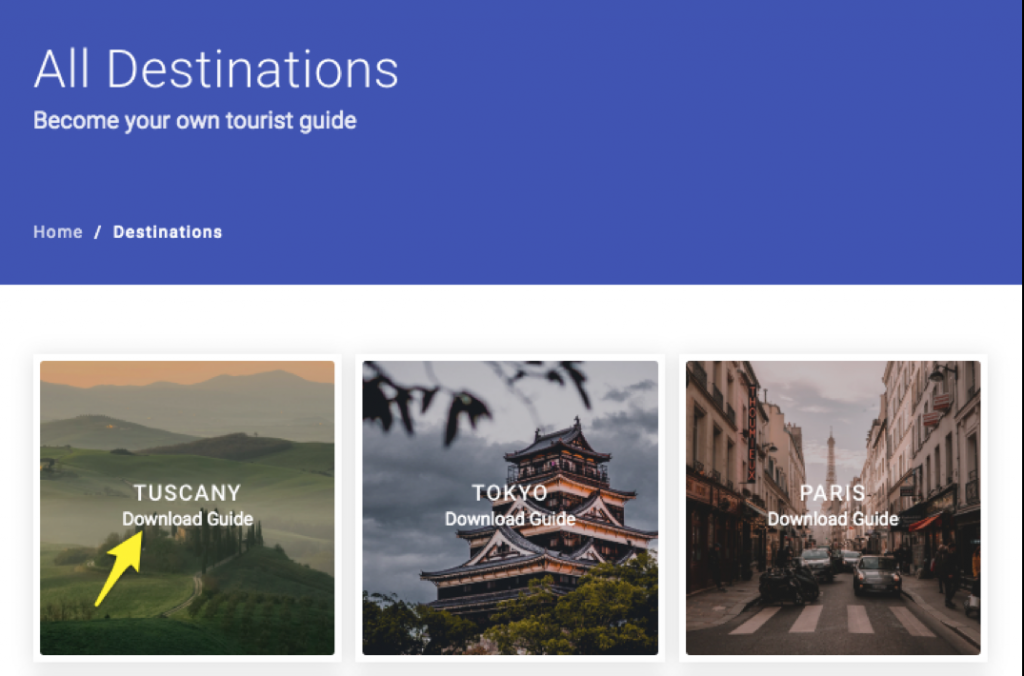
While knowing how many downloads of the destination guide is useful, it is important to know which guide was most downloaded and be able to segment the downloads by user profile or related advertising to the destination. The file_download automated event has many parameters; we probably won’t need them all for our insights. (Automatically-tracked parameters are: file_extension, file_name, link_classes, link_domain, link_id, link_text, link_url)
We want to report on the destination and downloaded file name (maybe we have different versions of the guide); hence, we select only these parameters to be included in the reporting:
- link_text (Tuscany, Tokyo..)
- file_name (to see which version of the guide they downloaded and study the behavior afterwards)
To configure the parameter reporting, go into the event list and click the Edit Parameter Reporting and then add the parameters to start tracking them into reports.
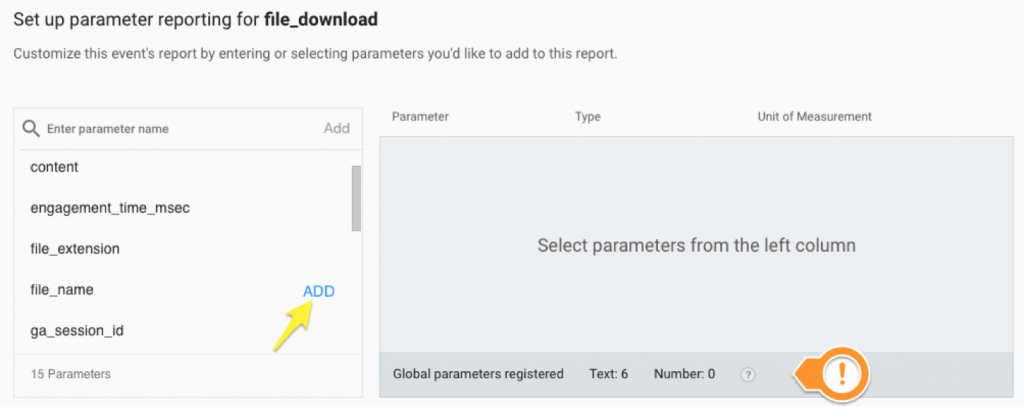
While you can track all available parameters, it’s important to keep in mind the configuration limits when doing these configurations. You can configure up to 100 custom event parameters per project (50 numeric and 50 textual) to include in reporting by registering those parameters with their corresponding events.
Once you register your custom parameters, Analytics displays a corresponding data card in each related event-detail report, and it will be included in the data exported to BigQuery if you chose to link your project to BigQuery.
Tip 3: Use Realtime to Validate Events
If you were previously disappointed with the limited capabilities in validating tracking through the Realtime reports in Universal Analytics, I can assure you that App + Web Realtime (or Streamview, as Firebase calls it) will make you happy.
Any tracked event is visible in realtime, with every single parameter value, including full details of the page, visit source and medium, as well.
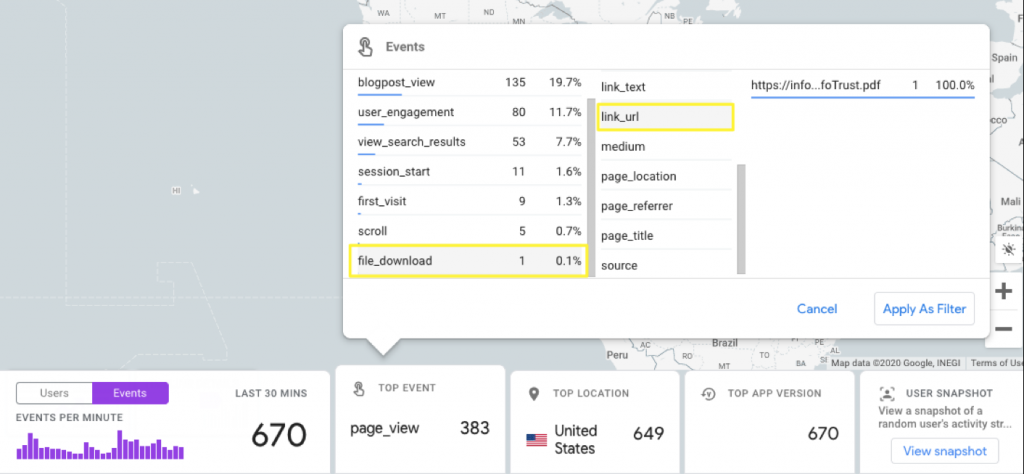
Back to the previous example of a file_download event; all the parameters are visible in realtime, (without needing to configure parameter reporting) so you can validate your tracking . This is available for all events, whether automatically-tracked or custom.
See below screenshot for the realtime view of file_download where I tested downloading a file and saw the hit including all parameters, with the ability to select a parameter and view its value (I selected link_url).
Quality, Not Quantity
The powerful event-based tracking may tempt you to track each action in its own custom event and pass a long list of custom parameters. But remember that “With great power comes great responsibility,” so use these powers wisely and try to outline your events and tracking strategy before you start coding.
The next article in this series will cover some tracking strategy examples for App + Web to help you get started, so stay tuned!

