Google Analytics, which is arguably one of the most important and widely used web and app analytics tools, saw the release of its latest version known as Google Analytics 4 (GA4) in 2019.
GA4, which is designed to be the source of truth, comes with user privacy controls such as cookieless measurement and conversion modeling that allows users to deliver performance and privacy simultaneously.
GA4 came with a lot of changes and new features, ranging from the data model which was session-based in Universal Analytics (UA) to event-based in GA4, as well as Goals in UA changing to conversion in GA4.
What’s New in the GA4 Conversion (Goals)
Goals in UA were a way of measuring conversion points and user actions that were important to businesses. In UA, Goals were created at view-level and had a limit of 20 Goals per view. While in GA4, Property Views and Goals were replaced with sub-properties and conversion events respectively.
Find some of the differences between UA Goals and GA4 event conversions in the below table:
| UA | GA4 | |
|---|---|---|
| Types | - Destination - Duration - Page/Screens per session - Event | Only the Destination and Event type of UA goals can replicate as conversion in GA4 |
| Match Types/Operators | - equals to - begins with - regular expression | - equals/does not equal - contains - starts with - ends with - is greater than - is less than |
| Matching Conditions | parameter selections are limited to event category, action, label, value, screen name/web page URL | GA4 operates with events and parameters for conditions, using all available parameters including custom parameters for a selected event |
| Limit | Goals are limited to 20 per reporting view | - Any captured event can be marked as a conversion - 360 users can register up to 30 custom conversion events |
How to Define a Conversion in GA4
In GA4, there are two ways to define conversions that are important to your business. This can be done by:
- Marking already-tracked events as conversion
- Creating a new custom conversion from tracked events
Steps to Setting Already-Tracked Events as Conversion
If you are looking at having already-tracked and active events marked as conversions, the below steps will help you achieve just that.
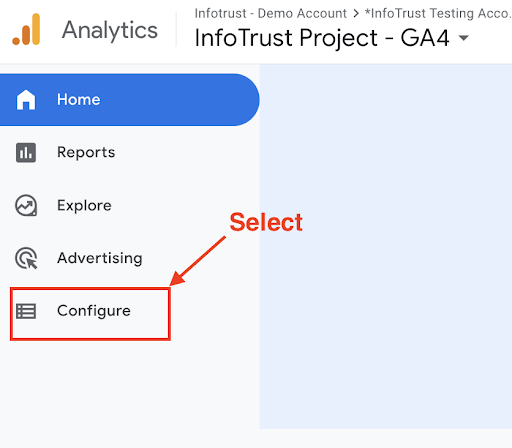
Step 1: Navigate to your GA4 property and Select the Configure button.

Step 2: Then select the Events tab. By default you will land on the event page window.

Step 3: On the event window, you will see a list of the events that are currently tracked and the option to mark each of the events as a conversion. Now toggle the switch beside the events you want to mark as conversion and the color will change to blue which means “ON”.
From the image below, we have selected the add_to_cart and begin_checkout as conversion events.

Step 4: Next, select the conversion tab to view the list of events marked as conversion.

Note: You can also revoke any event from the list of conversion events by toggling the switch beside any of the events seen on the conversion window.
Steps to Create GA4 Conversions from Tracked Events
While the above steps are for marking already-tracked and active events as conversions, note that every time a user triggers any of the marked events a conversion will be recorded. For example, the add_to_cart and begin_checkout events we marked as conversions in the steps above will be counted as a conversion whenever a user adds an item to cart or triggers the begin_checkout event.
But if we want only add_to_cart of a particular item to be counted as a conversion or when a specific item is in the cart when the begin_checkout event is triggered, then we will need to create a new event from an existing event by adding extra context to the event.
To create conversions from the already tracked events, follow the steps below.
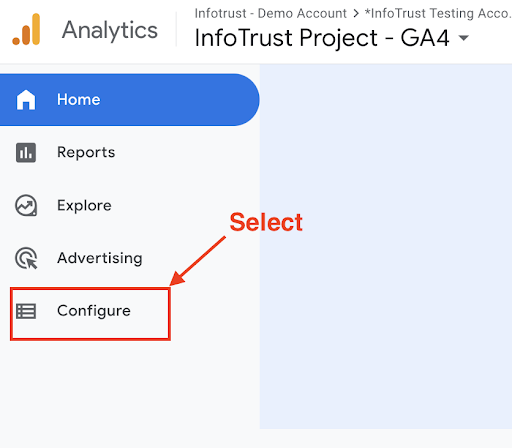
Step 1: Navigate to your GA4 property and select the Configure button.

Step 2: Then Select the Events tab.

Step 3: Click on the Create event button, to land on the custom event window.

Step 4: Next, click on the Create button, to open the new event configuration window.

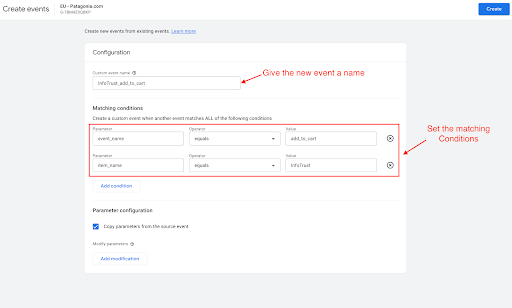
- Enter the name of the new event.
- Next, set the matching conditions for the new custom event. In our case, we are creating a custom event to track when a specific product is added to cart.
- Set the first condition parameter to be event_name, the operator as equals, and value set to add_to_cart.
- Also set the second condition parameter to be the item_name, the operator as equals, and value set to item_name of your choice. In our case we are using InfoTrust_add_to_cart.

Note that we applied the two matching conditions because we only want the custom event to trigger and be recorded as a conversion when a user adds a specific product to cart.
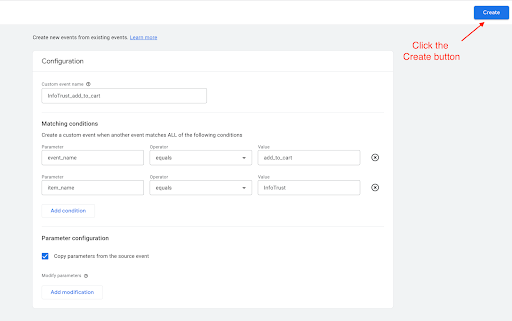
Step 5: Finally, click “Create” in the upper right-hand corner of the window.

Step 6: You can now see the newly created event listed under Custom Events.
Now that we have successfully created the custom event, it will not appear on the list of existing events until an add_to_cart event that matches the two conditions we defined is triggered. Once the custom event we just created is triggered, it will automatically appear on the event list and you can then mark it as a conversion by toggling the switch as shown below.

And that is how to set up conversion tracking in GA4!


