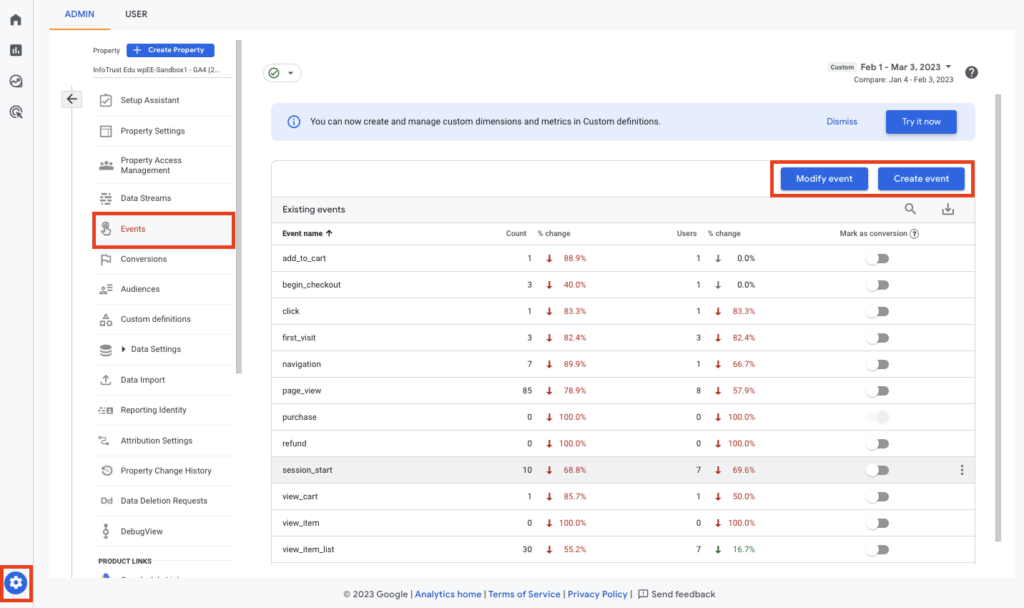
Google Analytics 4 (GA4) allows you to create or modify events within the GA4 UI at the property level. This feature can be found in Admin > Events. Creating and modifying events is what it sounds like—you can create new events or modify events based on events being captured client-side. Just remember that this is not a retroactive feature, meaning it will only apply to data moving forward. Also, you’ll need editor or admin access.
In this article, we’ll cover how to use the event creation/modification GA4 feature, but be sure to stay tuned for Part 2 which will cover what you should consider before actually using this feature.
Modifying Events
First, let’s find this feature within your UI.
Navigate to admin, in the property admin section click events, and then click Modify event.
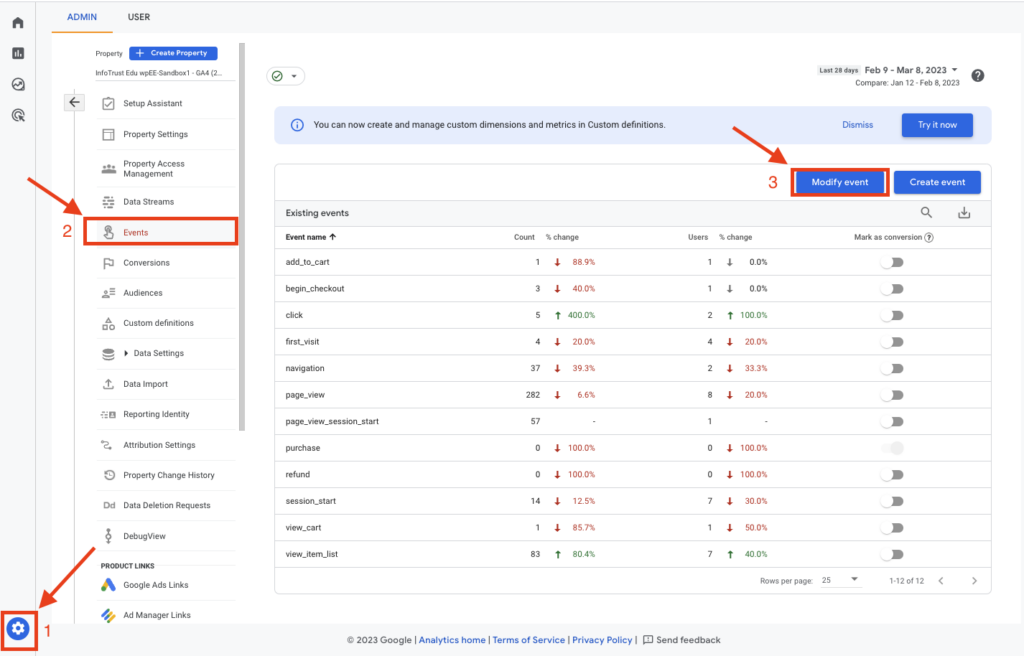
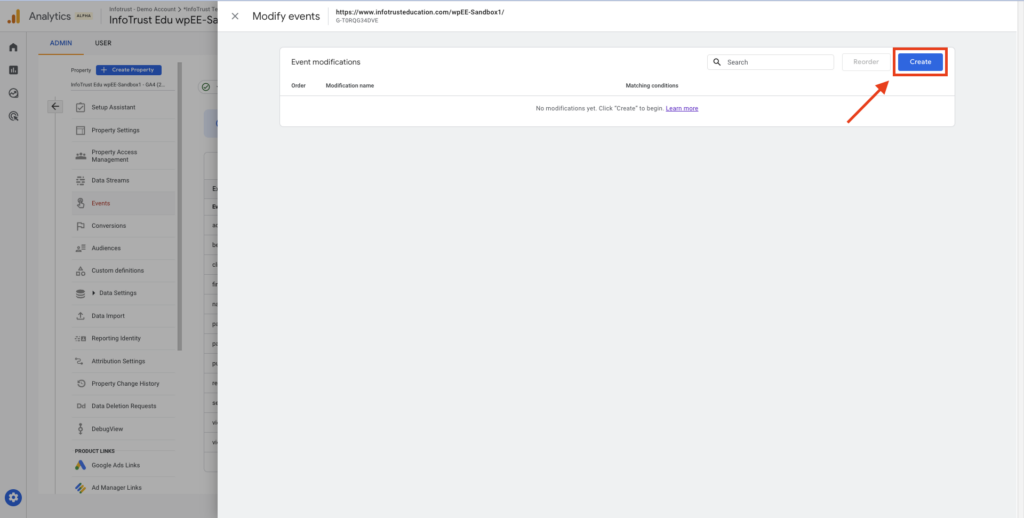
After clicking “Modify event”, it’ll bring you to the Modify Events menu.
Click “Create”.
You are now at the part at which you can create an event modification. Modifying an event is really broken up into three sections:
- Name/Descriptor of Event modification: I recommend having a consistent and intuitive naming convention to keep things as tidy as you can.
- I personally like {{parameter/event being modified}} | {{type of modification}} | {{actual modification}}
- Matching Conditions: All the conditions have to match in order for GA4 to make the modification.
- Modify Parameters: The parameter you are either adding, removing, or editing. It’s best practice to avoid tampering with standard events such as page_view or e-commerce events such as a purchase.
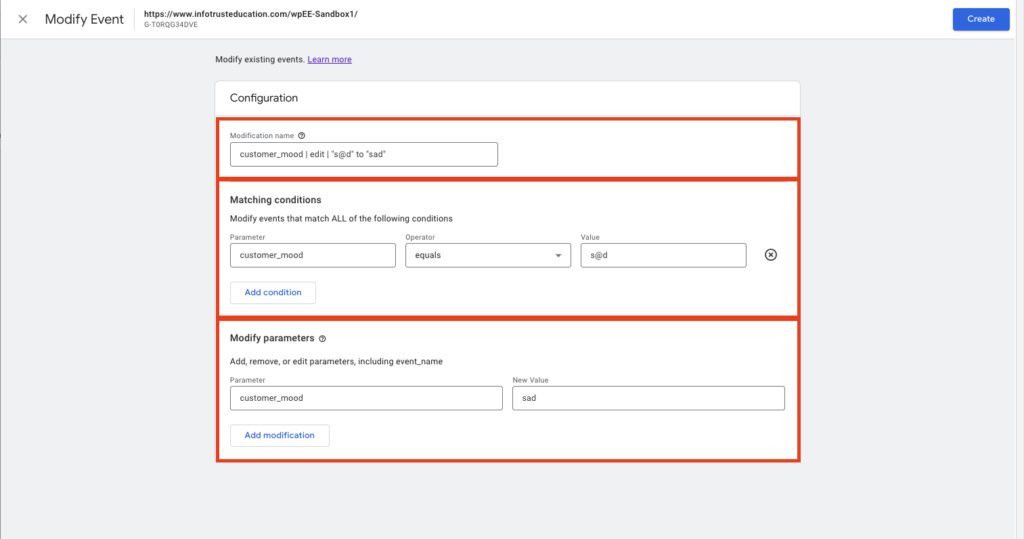
In my scenario, I am editing a typo for a hypothetical parameter capturing “customer_mood”. I noticed that whenever the customer_mood parameter is supposed to send ‘sad’, it has a typo of ‘s@d’. So I have made a matching condition of whenever customer_mood = “s@d”, to modify the parameter and instead send customer_mood = “sad”.
Once done, click create and it should appear in your modify events menu. Remember neither modifications nor creations apply to historical data. Data is modified on the client-side before the data is sent. It may take a couple of hours before your modifications take effect.
Creating Events
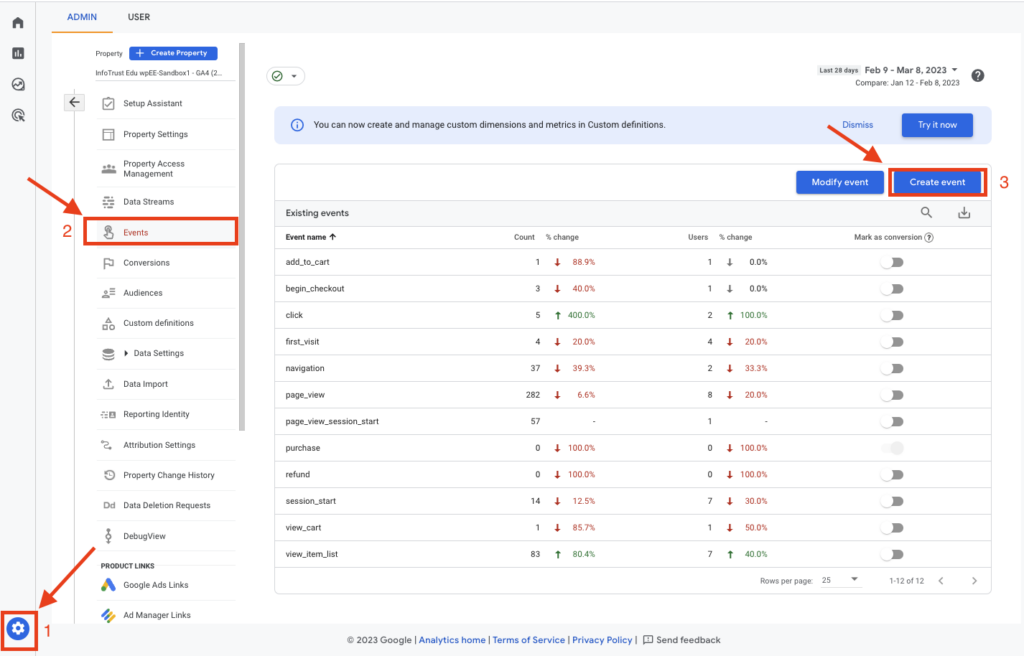
Just like modifying events, navigate to admin, in the property admin section click events, and then click Create event.
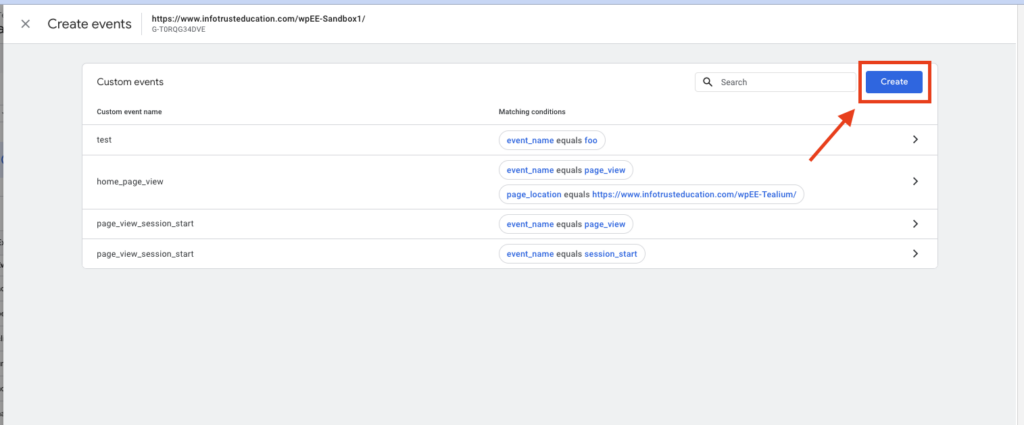
After clicking “Create event”, it’ll bring you to the Modify Events menu.
Click “Create”.
You are now at the part at which you can create an event. Creating an event is really broken up into three sections:
- Name of Event: I recommend a naming convention consistent with your current GA4 events and/or following Google’s guidelines and recommendations.
- Matching Conditions: All conditions have to match in order for GA4 to create the event.
- Parameter Configuration: Decide if you want to copy parameters from the source event and/or modify parameters.
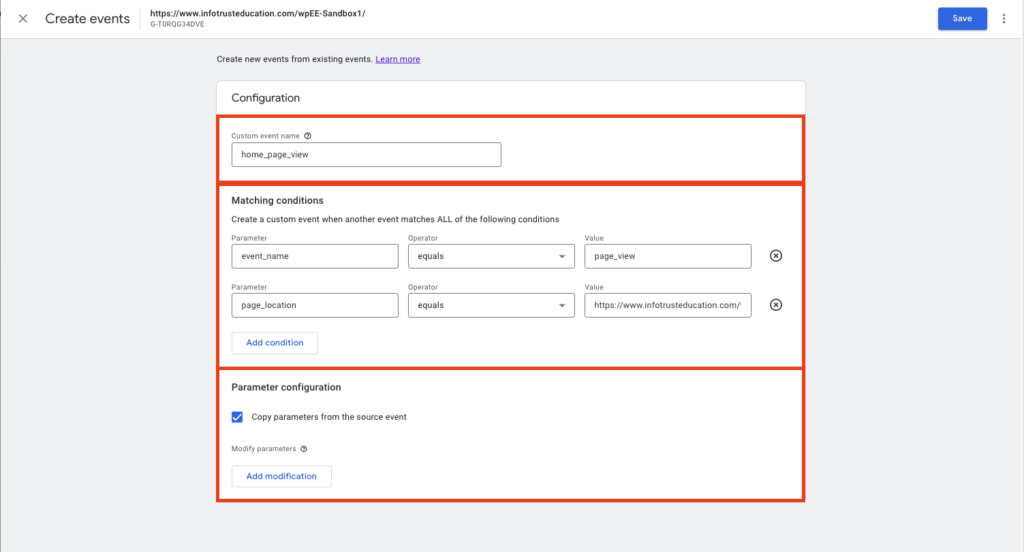
In my scenario, I wanted to track home_page_view as a separate event. The configuration is set so that every time there is a page_view on the home page URL, it sends an event with home_page_view and copies its parameters.
Why would anyone create an event that can otherwise be filtered by page location? Typically, it would be if you want to mark an event as a conversion but only when it has a specific parameter.
Once done, click create and it should appear in your create events menu. Remember neither modifications nor creations apply to historical data. Data is modified on the client-side before the data is sent. It may take a couple of hours before your modifications take effect.
Conclusion
Setting up and modifying events may seem like a pretty easy and intuitive feature to use … and for the most part, it is! Check out my part 2 to make sure you understand and consider what effects modifying and creating events can have.


