

The funnel report is one of the most important reports available to digital marketers. Luckily, Google Analytics 4 (GA4) has made funnel reports more powerful and easier than ever within its Explore Tab!
In this article, I will demonstrate how to build a GA4 funnel in as little as 10 minutes! We’ll go from a blank canvas to a funnel report quickly to get you the insights you need.
If you need to leverage advanced functionalities, be sure to read the second section of this article below: GA4 Funnel Explorations – Advanced Functionalities.
NOW
AFTER

Demo Account
I’ll be using Google’s GA4 demo account for this article. If you’d like to follow along, use either Google’s demo account or navigate to your GA4 property, go to Explore, create a new report, and choose Funnel Exploration as the technique.
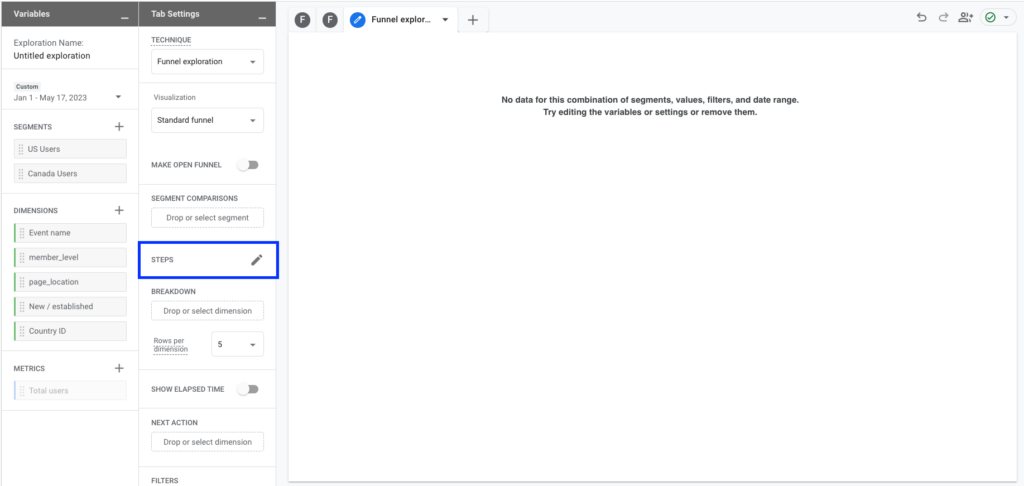
Creating “Steps”
Select the STEPS option in the Tab Settings panel.
Conditions
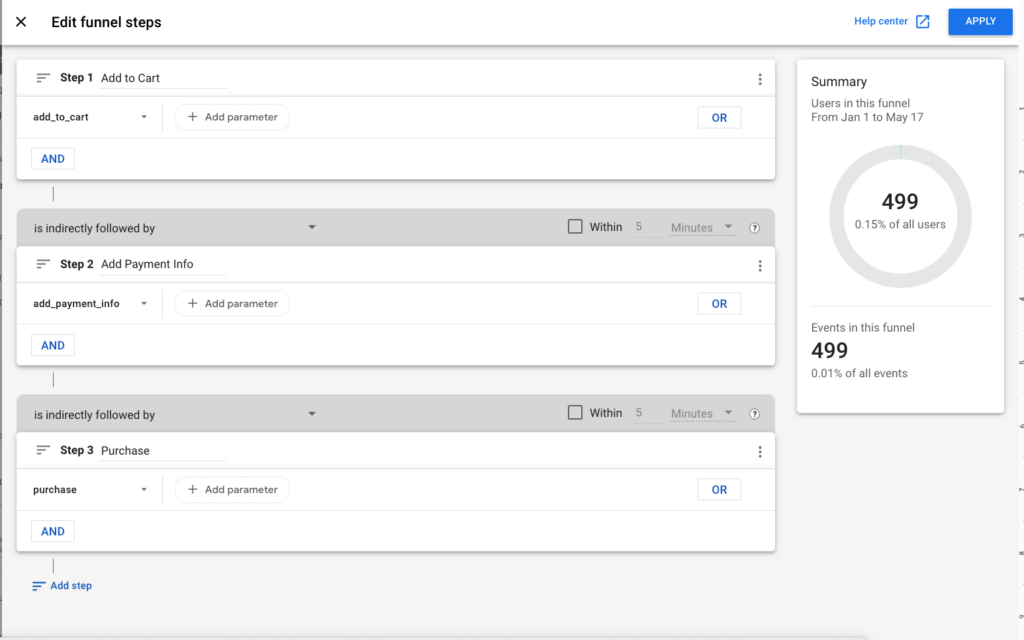
The first thing we want to do is create each step of the funnel. For each step, you need to specify conditions. Conditions are created by selecting an event or dimension that an individual needs to perform or have as a part of their action. You can append parameters to conditions or add multiple conditions to each step to get more granular (with “AND”) or broader (with “OR”).
Adding/Removing Steps
You can add steps by clicking “Add step” below your most recent step or you can select the three-dotted icons in the top right of steps to copy, remove, add a step above, or add a step below the selected step.
Directly or Indirectly Followed By (User Beware)
When you add a step, many of the same options are presented but new options also appear. You’ll notice that when you add any step beyond your first step you can choose if that added step directly or indirectly follows the previous step.
User Beware: If you choose “directly followed by”, this means the very next action the user takes on your website is going to have to meet the conditions specified to not abandon the funnel. So for example, if step 1 is add_shipping_ info and step 2 is set to be directly followed by add_payment_info, if the user triggers a scroll event between the two steps, they’ll abandon the funnel after step 1.
Within (Timeframe)
You can also check the “within a timeframe” box and set the duration accordingly. This requires that the user has to complete the step that follows within a certain timeframe to avoid abandoning the funnel.
In my example, I kept my funnel simple by choosing a specific event as a condition for each step. I chose add_to_cart for Step 1, add_payment_info for Step 2, and purchase for Step 3 with default options chosen for all steps.
Making an Open or Closed Funnel
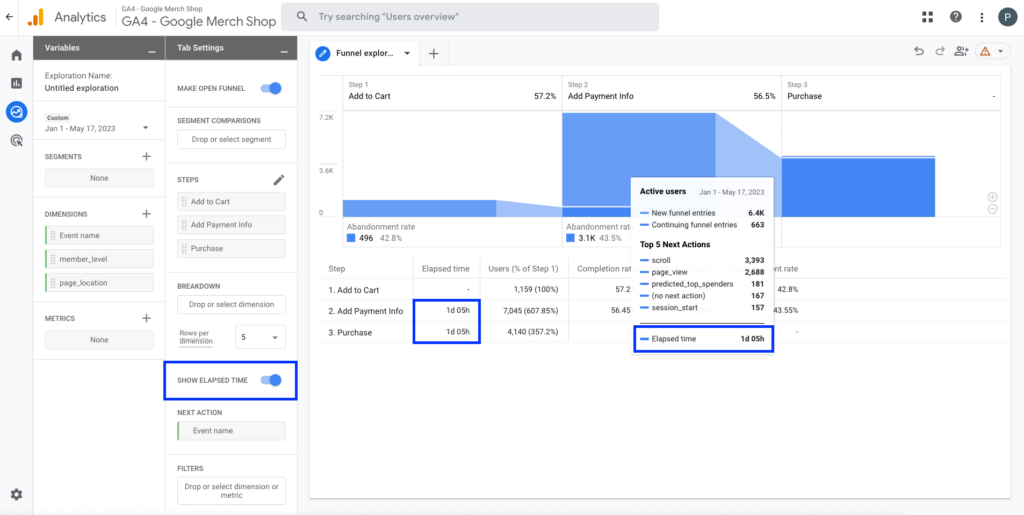
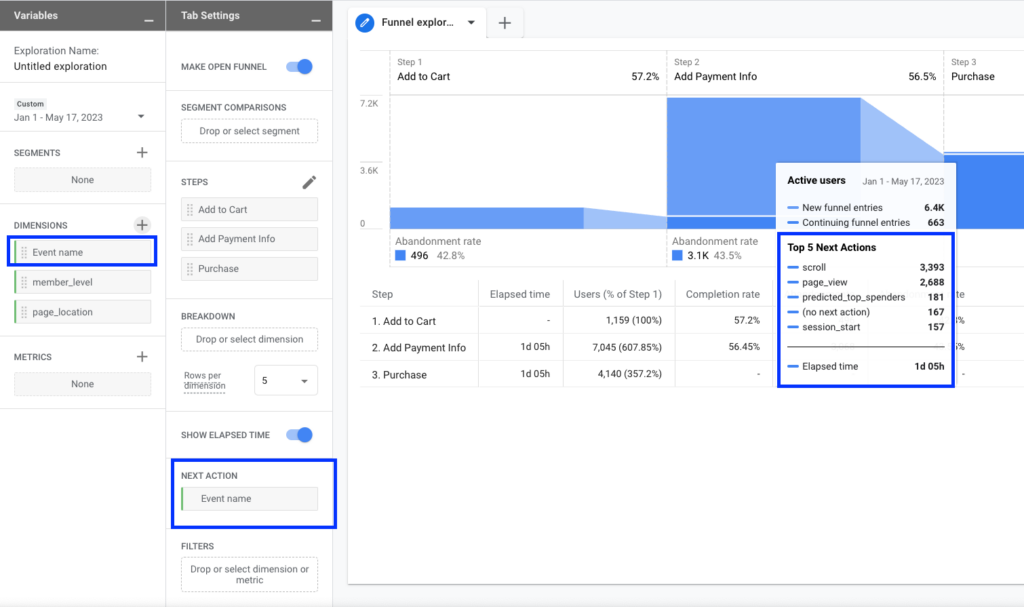
You can make your funnel open or closed. A closed funnel requires users to enter your funnel at the first step of the funnel. An open funnel allows a user to enter the funnel at any step. The funnel will display how many are new or continuing users for each step. In my example, I toggled my funnel to be open.

GA4 Funnel Explorations – Advanced Functionalities
The first section of the article should help you build a simple yet very useful funnel. Now, let’s get into leveraging advanced functionalities to provide more granularity. Below you’ll see the before and after of the funnel I built in this section.
NOW

AFTER

Show Elapsed Time
The Show Elapsed Time Toggle will provide you the average elapsed time between each step.
Dimensions and Metrics
Reports allow you to add dimensions and metrics. Additional dimensions can be used for breakdown, next action, or filters. Additional metrics cannot be added to funnel explorations. By default, the funnel exploration always shows the number of users. Below, I’ve created what type of additional dimensions/metrics you can leverage in GA4 funnel explorations.
| Scope | Dimensions | Metrics |
|---|---|---|
| Item | No | No |
| Event | Yes | No |
| User | Yes | No |
Next Action
Next action will show you the top five next actions taken by a user by event name. Be sure to first select event name as a dimension, and then select event name when selecting Next Action.
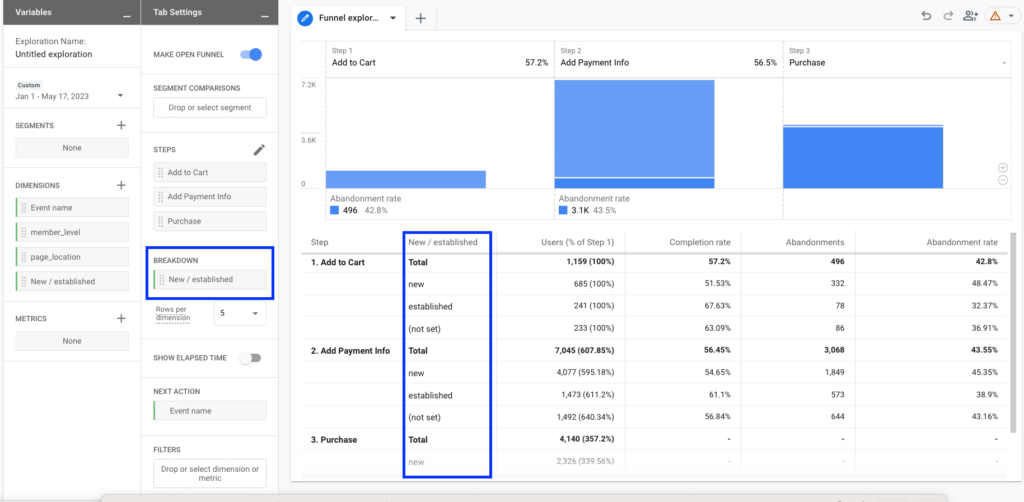
Breakdown
Breakdown allows you to extract more granularity about each step. Simply select a dimension and it will nest the data within the table. I selected the New/established user-scoped dimension.
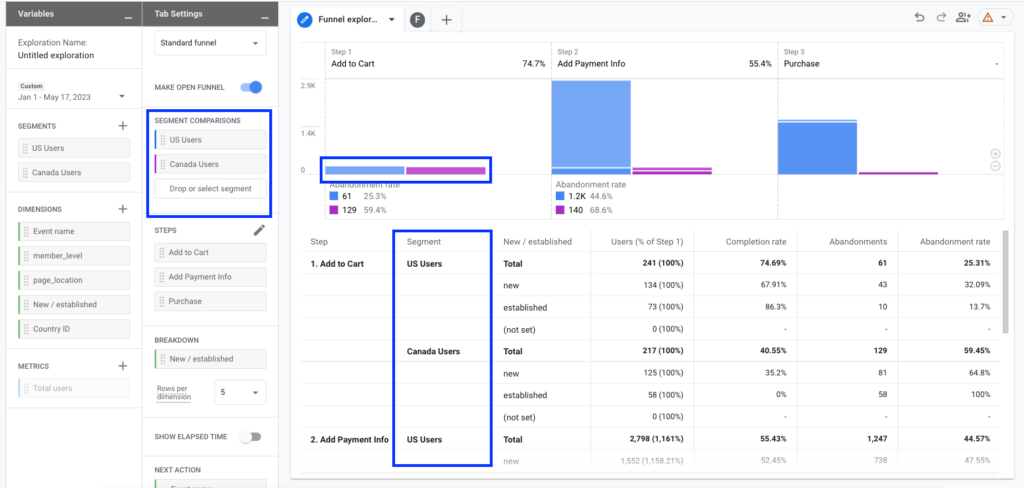
Segments
Create segments using a variety of conditions to visualize how user journeys differ. I created two segments in my example, U.S. users and Canada users by country ID.
Trended Funnel Option
The visualization option has a dropdown to select a Standard funnel or Trended funnel. The trended funnel will provide a line chart to visualize your segmented users over time to analyze how they are trending/performing. For my example, I kept my funnel standard.
Filters
Filters in Funnel Exploration, similar to other GA4 reports, allow you to filter data by dimension to exclude unwanted data. It is the bottom-most option in Tab Settings. I did not apply a filter for my report.
A Comprehensive GA4 Funnel Exploration
And … voila! You now have the knowledge to build a comprehensive advanced GA4 funnel.
Pro tip: Only use data and features you need for analysis, otherwise your reports will become too noisy.
